Showing posts with label Cake. Show all posts

Tuesday, September 8, 2015

Daniel Tiger Birthday

We celebrated my daughter's 2nd birthday this year with a fun Daniel Tiger theme. She is obsessed with Daniel Tiger--it is the only show she wants to watch. I, of course, loved the idea of doing a Daniel Tiger theme--I have a soft spot in my heart for him from all my years as a little kid watching Mr. Roger's Neighborhood with Trolley and such. I love the new spin off of that show in the form of sweet and cuddly Daniel Tiger.

The first element that I knew was a must on the cake was Trolley itself. I printed off a picture of Trolley from the internet, and cut it apart into the different elements of the trolley. Then I rolled modeling chocolate out, in varying thicknesses, put the paper template on top of the correct piece of modeling chocolate, and cut each piece out with an exacto knife. Then as I assembled it on the side of my bottom tier, it seemed to come to life with the varying thicknesses of the trolley, almost looking 3 dimentional.


Next I wanted to put Daniel Tiger's house on top. I cut slats into the fondant to make wood planks, then distressed them a little with a little roller tool, and finally painted on the white fondant with brown food coloring mixed with lemon extract. I followed the tutorial here for doing the wood look.
My husband had bought me a clay extruder gun for Christmas, that I was so excited that I finally got to use when I made this cake. I used the gun to make the sticks for the roof of Daniel's house. It was time consuming, but turned out just how I envisioned!

For the final touches on the cake I made a Happy birthday banner out of modeling chocolate, and put Daniel, Katerina Kittycat, and Miss Elaina on top by Daniel's house.


We also served some other Tiger-inspired snacks--Tiger cupcakes

 Tiger tails (pretzels dipped in orange candy melts and drizzled with milk chocolate.)
And these adorable Tiger mandarin orange cups were so fun for my 6 and 4 year olds to make, so that they felt like they were contributing to the party prep.


 It turned out cute, and she was so excited about her cake. That was 4 months ago, and she still talks about her cake everyday and loved it. Here are a couple pictures of the birthday girl with her cake--the one below she was attempting to blow the candle out, but ended up needing a little help from her sisters and cousins.

What was hiding inside the cake?  We'll you can't make a tiger cake with out making the inside tiger striped. To know how to do this technique, check out my post here where I make a zebra striped cake.
Ugga Mugga!

Tuesday, February 15, 2011

Valentine's Chocolate Box Brownie

This year I wanted to surprise my wonderful husband with something. I saw a similar idea to this a while back on Bakerella's site, and decided that with a few tweeks, this would be perfect for him. Here is how I did it:

I started off by making some red modeling chocolate out of a bag of red Wilton candy melts and corn syrup. It is super easy to make and great to work with. I decided to do this instead of using red fondant as directed in Bakerella's instructions because I can make it myself for cheap, and get a really rich red color. I also haven't found a good recipe yet to make homemade red fondant that is really red, and I hate spending so much on a little amount of fondant at the store. You can find the recipe at the end of the post.

I rolled out my red modeling chocolate about 1/8" in thickness and cut one heart the size of my heart cake pan, and one about 1/2" larger around. The easiest way to do this is roll it out on wax paper, then trace the heart on another piece of wax paper in both sizes needed, cut out the heart, lay it on the modeling chocolate, then use a knife to cut it out.

This can be done a few days in advance, and left on the wax paper until needed.

You then need to bake your cake in the heart pan--whatever flavor you want--or if your husband doesn't like cake you can do as I did and bake . . .

a yummy heart shaped brownie. Delicious. Level it off and place it on top of the larger modeling chocolate heart. Now if that doesn't look good enough, just wait . . .


Yes. Ganache. Everything tastes better with ganache. I made up a batch to act as my icing to glue things together. You can use frosting if you want, but nothing is much better than some rich ganache.

Carefully spread it over the top and sides of the brownie. The sides can be a wee bit tricky, so do those especially carefully. It doesn't require a lot of ganache, so if you are like me and make a full batch, you may have a lot left over. Put it to some good use. I recommend microwaved smores with a layer of it as your chocolate. Mmmmm.

Next place the smaller red heart on top. The ganche will help it stick to the brownie.

For the sides of the box, roll out the rest of the modeling chocolate into a long strip.

Cut a band long enough to wrap around the entire brownie, and wide enough so that it sits up about 1/2" higher than the box. Then starting at the top center of the heart wrap the piece around the entire box and cut off the excess. The seam smooths together quite well with the modeling chocolate.


And there you have a completely edible Valentine's box. Now what to fill it with? . . .

Well, I decided that if it was going to be for my husband, it would have to be one thing--chocolate covered strawberries. His favorite. These are quick to make. Just a bunch of washed and dried strawberries (really dried--we don't want any water ruining our chocolate), and some more candy melts--this time white and cocoa colored. Melt them according to the pkg. instructions and dip away. Once they've hardened you can decorate with the other color. I found that an easy way to do this is pour the chocolate into a ziploc bag, seal, and snip a TINY hole in one of the corners. Then all you do is squeeze while moving you hand back and forth.


Oops. That one in the center got a little too much . . . I might have done that on purpose. I mean really--I can't just let my messups go to waste.


Fill the box with the best ones. Do what you like with the rest. That shouldn't take too much imagination :)

A Valentine's treat sure to put a smile on his face.

Well, we had a great Valentine's Day. My 2 year old wanted to make something for daddy too, so we used up the rest of the brownie batter to make a small brownie heart that we covered in lots of ganache, and she went to town on decorating.


Isn't her creation beautiful? She had a blast decorating it, and her daddy LOVED it.


Happy Valentine's Day!!

Modeling chocolate recipe:

1 140z pkg wilton candy melts
1/3 cup light corn syrup

Melt the candy melts according to pkg instructions. When all melted stir in corn syrup and stir until all incorporated. Turn out onto some wax paper and let set up for a couple hours, then wrap in saran wrap and store at room temp until needed. Usually works better if you make it up at least a day before hand.

When ready to use it start kneading it until it is smooth and can be rolled out. It may be pretty hard at first so you might need to knead a little at a time until it is pliable and easy to use. Sprinkling a little cornstarch on your surface will help prevent it from sticking. I like to roll it out on wax paper for that purpose too.

It can be stored for several weeks at room temp.

Sunday, February 6, 2011

Tangled


I got to do a Tangled/Rapunzel themed cake this week for a friend's daughter who was turning 4. I have to say, I had a lot of fun making this cake. I got to try a few new techniques that I have been wanting to do, and had fun learning as I went along.


What would a Rapunzel cake be without the tower? I molded this tower out of rice krispy treats, and covered it in modeling chocolate. I heard on Cake Boss one time that modeling chocolate is definitely something good to have in your "arsenal of cake decorating methods"--and now I see why. It is easy to smooth out seams when covering something, and is great for molding shapes and objects.

This was my favorite part of the cake--the quaint rock bridge--also made out of modeling chocolate. Can I have one in my backyard? Blue piping gel over a blue piece of fondant made a very real looking river.

The cascade of hair was fondant with gumtex. I put some wire in it to give it a little more structure. I tried texturing it a little with a razor blade to make it seem a little more like hair, then brushed it with some gold luster dust.
The trees were also a modeling chocolate experiment. It worked. I just wish I would have thought earlier to make a little "Wanted" poster for Flynn Rider to stick on one of them.
A few final touches with some candy rocks, piped grass, and fondant flowers made it a fairy tale ending.

Tuesday, September 7, 2010

Baby Under Construction


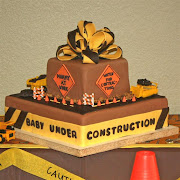
I had so much fun making this cake for my friend Marci's baby shower. A few of our other friends threw the shower for her, using this theme: Baby Under Construction. When I heard what the theme was, the wheels in my head started turning, and this cake is pretty much exactly like my original sketch.

I had two tiers: a 12" square base and 6" square top. I cheated and only did rice crispy treats for the bottom tier (that would have been way too much cake for us to eat). I knew that I needed some brown and black fondant. I didn't have either on hand, nor did I want to run out to the cake supply store and spend a fortune on it, so I decided to make up some marshmallow fondant. I had found a recipe online for chocolate marshmallow fondant, that promised I could get very black fondant from it by only adding 1-2 tsp black food coloring. I have to admit, I was pretty skeptical--true black is usually so hard to get--but I was very pleasantly surprised. I'll post the recipe for it at the bottom of this post.

I put one recipe of the chocolate fondant to use by covering both tiers in it, them my second recipe (which I turned black) I used for my caution tape bow and band as well as the road. Who would have thought that caution tape would bring so many smiles to my face?!

Here is the fun part--adding all the detailing . . .
road closure signs made out of fondant + gum tex

and the cute little orange cones--can't have construction without those. And around here they seem to leave them up on our streets even when they aren't doing construction!


And of course some trucks doing all the work. (I know--I cheated and just bought these rather than trying to make them out of gumpaste. I can only get so much done now with a needy toddler and 30 weeks pregnant. )

this one is plowing the Famous Amos cookie crumb rocks off the road.

and the hazard signs. These were the most fun to make.


My husband and I kept coming up with other ones too:
Caution Wide Load
Road Closure 6 Weeks
Detour Ahead
Bumpy Road Ahead
Watch Shoulder
etc.
We laughed so hard thinking these up.

Well, the party was amazing. I have such incredibly talented friends, who put together an adorable baby under construction themed shower for Marci, complete with table runners, dump trucks, caution tape, matching candy, and so much more.
It was a wonderful shower with wonderful friends.
Congratulations, Marci!


Chocolate Marshmallow Fondant Recipe:
6 oz. of semi sweet chocolate chips (about 1/2 of a bag)
1 bag of mini marshmallows
3 T of clear Karo syrup
3 T water
1 1lb bag of powdered sugar
gel black food coloring (if wanting black fondant)
Crisco

1. Put your marshmallows in a microwave safe bowl, add the water, and microwave on high for 1 minute. Stir mixture, and microwave for another minute. Stir again (marshmallows will be very hot).
2. Immediately add your chocolate chips and stir until the chips are all melted.
3. Add Karo syrup and stir again, this time with a butter knife, making sure that all the syrup is incorporated.
4. If you want black fondant, this is the point when you would add your coloring. I used about 1 tsp and it was very black.
5. Place 1/2 of your powdered sugar in a pregreased Kitchenaid with greased dough hook attached. Pour marshmallow mixture over top (and scrap out all using a spatula). Knead fondant on medium speed. Continue adding powdered sugar in 1/2 cup increments until fondant is not sticky. By the end I usually have to knead a little bit more sugar in by hand on a well-greased surface. The amount of powdered sugar you need may vary depending on the humidity of where you live.

It should be done when it is pliable and non-sticky. I like to wrap mine in a couple of layers of saran wrap and let it rest for a couple of hours before using it. It can be stored for at least a month if coated with a thin layer of crisco, wrapped tight in plastic wrap, sealed in a ziploc bag, and stored in an airtight container.