Every February across the United States, cub scout groups are having their annual "blue and gold" banquet--a sort of birthday party to celebrate the establishment of the cub scouting program. This was my first year to help out with this banquet. No, I do not have any boys. I actually have 2 adorable little girls and another girl on the way (my husband is seriously outnumbered around here), but my dear husband happens to be the "cub master" in our church congregation's cub scouting program. He gets to be in charge of things like the blue and gold banquet, pine wood derby, space derby, and other events for the scouts. Thanks to his new calling I am slowly starting to learn the ropes of cub scouts, even all of their silly cheers and jokes (some of which I can't help roll my eyes at, wondering how they find it so funny, then realizing that I have never been an 8-11 year old boy so I probably will never understand).
.jpg)
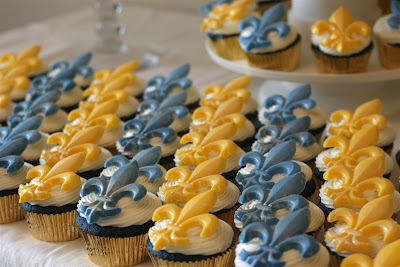
When my hubby asked me to make 100 cupcakes for this event, I immediately knew that I wanted to do my blue velvet cupcakes--just your classic red velvet cupcake with royal blue dye substituted for the red. Topping that with a delicious cream cheese frosting and wrapping up the bundle in a gold foil wrapper would be perfect for a "blue and gold" banquet.
Yes, they were very, very blue. Maybe I'll use a smidge less blue coloring next time.
.jpg)
I had just gotten in the mail my new french star tip. I have wanted this tip for awhile and was pretty giddy to try it out. Oh, how I love it--making such pretty and elegant spirals of frosting on top of the cake.
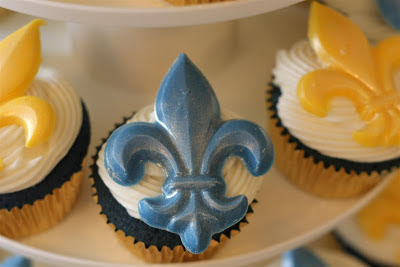
I also ordered in from Amazon.com a fleur de lis chocolate mold to make these chocolate toppers for the cupcakes. After making all the molded chocolates out of blue and yellow candy melts (I did add extra royal blue oil based dye into the blue candy melts to get the right color), I brushed them with some dry gold luster dust to add some shimmer and make them look a little more like metal/gold instead of chocolate.
.jpg)
The result was this cute little cupcake with an edible cub scout symbol on top.
.jpg)
This was the display I set up in my home so I could take some pictures before heading over to the church with all the cupcakes--I wasn't so sure of the set up my dear husband had in mind. Sometimes our "visions" are a little different--him more practical, me more arsty I guess. This is what it ended up being there...
A table set up in the storage closet off of the gymnasium. He insisted that if I did a display, they had to be in there, so the doors could stay closed until it was actually time for dessert. I guess he had a point--there is no telling what kind of self control 8-11 year old boys might have when there are 100 cupcakes staring them in the face all evening. I joked with my hubby that at least he coordinated the backdrop with the evening by having a blue and yellow ladder propped against the wall. We both got what we wanted I guess--me, the ability to arrange them all cute like little marching cub scouts (and let's be honest, that was probably all for me, since what 9 yr old boy really cares about what something looks like as long as it tastes good), and him the ability to "control the situation" and prevent chaos from breaking out in the middle of his speech...



.jpg)
+(2).jpg)
.jpg)
.jpg)
.jpg)

.jpg)
.jpg)
.jpg)
.jpg)
.jpg)
.jpg)
.jpg)
.jpg)
.jpg)
.jpg)
.jpg)
.jpg)
.jpg)
.jpg)
.jpg)
.jpg)
.jpg)
.jpg)
.jpg)
.jpg)
.jpg)
.jpg)
.jpg)
.jpg)

.jpg)
.jpg)


